Powered by Blogger.

MY BANNER

MY BANNER
You may take this banner to your blog or group

2/28-Sorry I have been MIA

>> Sunday, February 28, 2010

Sorry I have been MIA dued to bad storm over this weekend.  When I got home around 9:30 this morning, my internet doesn't working until around 4:00, finally got it fixed!! I have so much to catch up and write tut for it which I have idea what to make. I will have my new tut up soon. So keep eye for the new tut!!

Read more...

Kiss Me If I'm Irish Template #9

>> Sunday, February 21, 2010

Here is new template is called Kiss Me If I'm Irish
Download-HERE
I will have my new tut for St. Patrick's Day up soon. So keep eye on it!!

Read more...

I Love Blinkies Avatar (part 2)

>> Friday, February 19, 2010


PSP 7, 8, 9, 10, 11 OR 12

Tube of choose-I use Caron Vinson. You can purchase from CILM-HERE


Font of your choose. I use ROMANCE FATAL SERI


Filters-


Tramage-Tow The Line -You can download-HERE and HERE


1.File/New-150 x 150-white. Rename background


2.Open your tube of choose. Rename tube.


3.Layer/New Layer, rename gradient. Since you already made gradient so you don’t need to make again. Make sure it’s Angle-36 and Repeat-0. Fill it with gradient.


4.Effect/Tramage/Tow The Line. Default.


5.Copy your tube of choose and on your canvas, paste as new layer. Rename tube


6.Layer/New Layer. Fill with your color of choose (or you can choose gradient of choose). I use gold2 for the border. Selection/All Select. Selection/Modifty/Contract-5. Hit delete on your keyboard. Select None.


7.Layer/Merge/Merged Visible.


Save as JPG or PNG.


Make sure you add copyright/URL as well as watermark on your tag.


Read more...

2/17-UPDATE

>> Wednesday, February 17, 2010

Tomorrow, I will work on avatar. I promise!!

Read more...

I Love Blinkies Footer (part 1)

>> Tuesday, February 16, 2010


PSP 7, 8, 9, 10, 11 OR 12

Tube of choose-I use Caron Vinson. You can purchase from CILM-HERE


Font of your choose. I use ROMANCE FATAL SERI


Filters-


DSB Flux-Linear Transmission


Tramage-Tow The Line


Eye Candy 400-Swirl


Download-HERE and HERE (translate into HERE for english)


1.File/New-575 x 300-white. Rename background


2.To make gradient is so easy to do!! Edit-Before you make gradient, make sure you click on new (button) and type, you name it (I name Kiss It!). Click first arrow-color of your choose to match with your tube of choose. I use #caa7ca. On second arrow-color of your choose to match with your tube of choose, I use #8d6a9c. Click close, if the little window pop up (see my screenshot) and click YES. Make sure change to Angle-36/Repeat-0 and unticked invert and click OK. Layer/New layer and fill it with gradient. Rename swirl


3.Dupliciate gradient. Filters/DSB Flux-Linear Transmission. The settings are. Rename gradient


4.Magic Wand and click on each of light purple. Layer/new layer. Fill it with color of your choose. I use #5c432e (dark brown). Rename blinkie. Select None. Dupliciate 3 times and you should have 4 layers. Magic wand. On your palette, activity first. Click first blinkie. View-Currently Only. Adjust/Brightness and Contrast. The settings are: Brightness-0 and Contrast-30. Rename blinkie.


5.Repeat in step 4 until you have all of 4 layers. Select None. On your first blinkie. Filter-Tramages-Tow The Lines. The settings are. Repeat until you have all of 4 layers.


6. Click on raster 1 (you already made gradient earlier). Eye Candy 4000-Swirl. The setting are. On your duplicated gradient, opacity to 49 (so you can see the swirl) on your palette.


6.Copy your choose tube and on your canvas, paste as new layer. Resize-75% (3 times). On your palette, rename tube and duplicated 3 times. Same thing with bottom.


7. To close the layers, background, swirl, gradient, blinkie, tube. Layer/Merge Visible. Repeat until you HAVE ALL OF 4 LAYERS.


8.Active on top. Layer/New layer. Rename border. Fill it with color of your choose. I use gold. Selection/All Select. Selection/Modfity/Contract-5. Hit delete on your keyboard. Select None. Duplication 3 times. You should have 4 layers. Once again, to close layer. Merge and border. Repeat until you have ALL OF 4 LAYERS.


READY FOR ANIMATED?


1. On your palette, on your first layer. Copy and open AS3. Paste As New Animation. Then go back to psp, on your second, repeat and go back to AS3, paste into after current frame. Repeat until you have all of 4 layers.


2.On your first frame. Animation/frame properties, 200. 2 & 3-frame properties-55. And last frame-frame properties 200.


Last one, if you want add word art, just type anything you like. I type I LOVE BLINKIES! Copy and go back to AS3, paste as new animation. Copy word art and on your tool-propagate paste. Go to where the frames are. Edit-Paste/Into Select Frame.


For font on your tag, I use Romance Fatal Seri. Font of your choose.


Save as png or jpg.


Be sure to add copyright information/url included your watermark on your tag.


Read more...

TGIF masked

>> Sunday, February 14, 2010

PSP 7, 8, 9, 10, 11 OR 12

Tube of choose-I use Karen Middleton. You can purchase from CILM-HERE


Template-TGIF #8. Download-HERE . Enjoy your new template. :)


Font of your choose. I use STOPD


Scrap Kits (Wishful Thinking)-Download from her site-HERE


1.Open template-TGIF #8.


2.Click on TGIF mask. You can colorized it to match your tube of choose. Adjust/Hue/Saturation/Colorize-your choose colorize


3.Click on TGIF, again you can colorized to match your tube. Adjust/Hue/Saturation/Colorize-your choose colorize


4.Open Style_WishfulThinking_35mmFrameCluster. Copy and on your canvas, paste as new layer. Resize 75%(once) and make sure no ticked to All Layer. Move it down a little bit (see my tag). Magic Wand setting are:


ADD(shift)


RGB Value


Tolerance-0


Contigous (ticked)


Feather-0


Ant-Alias-Inside


Click on Style_WishfulThinking_35mmFrameCluster. Selection/All Select/Float/Defloat. Selection/Modifty/Expand-Pixie 5 and click OK.


5.Open Style_WishfulThinking_Paper_2. Copy and on your canvas, paste as new layer. Selection/Invert and hit delete on your keyboard. Select None. On your palette, move your raster 2 to bottom under the raster 1. Click on raster 2, you can colorized to match with your tube of choose. Adjust/Hue/Saturation/Colorize-your choose colorize.


6. Click on raster 1. Copy your tube of choose and on your canvas, paste as new layer. If your tube is too big to fit the frame. You can resize this (make sure no ticked to all layer). 75% (you can resize as size as you wish). Click on raster 2. Selection/All Select/Float/Defloat. Click on raster 3. Selection/invert. Eraser Tool/Eraser. To erase, just on bottom. Select None.


7.Open Style_WishfulThinking_AwardRibbon. Copy and on your canvas, paste as new layer. Resize 75%(4 times). Make sure no ticked to all layer. Move it on right corner of frame (see my tag).


8.Open Style_WishfulThinking-JournalBlock. Resize 75%(twice). Move it under raster 3. Image/Rotate/Free Rotate. Move it where the tube’s chin is(see my tag).


9.Click on raster 4.Text Tool-Font I use Iskoola Pota and I use #766e29 (color of your choose). You can write anything you like. I just type Friday is finally. Convert to Raster Layer. Image/Rotate, repeat in step 8. Again type HERE! And repeat in step 8.


9.Layer/Merge/Visible Merged.


10.Be sure to add your copyright/URL on your tag and as well as watermark.


11.Font-I use STOPD to add on your tag.


Save as png or jpg.


Be sure to add copyright information/url included your watermark on your tag.


Read more...

TGIF Template #8


Finally! I have new template is up! I will have my new tut up soon. So keep eye on it.

You can download-HERE

Read more...

Springtime

>> Tuesday, February 9, 2010


PSP 7, 8, 9, 10, 11 OR 12

Tube of choose-I use Rachael Anderson. You can purchase from CILM-HERE


Template-Spring Is Here! #7. Download-HERE . Enjoy your new template. :)


Font of your choose


Scrap Kits (Spring Flower)-Download from her site-HERE


1.Open template-Spring Is Here! #7


2.Click on Group Raster 1. You can colorized it to match your tube of choose.


3.Click on MARROON SQUARE, again you can colorized to match your tube.


4.Open ss_SpringFlower_FlowerStickers. Magic Wand/Selection Tool/Rectangle. Drag along to where you choose the flower (see my screenshot). Don’t Select None yet. Copy and on your canvas, paste as new layer. Resize 75% (2 times) and make sure no ticked to resize all layers. Move the flower to upper left corner (see my tag). Back to ss-SpringFlower_FlowerStickers. Select None. Close this.


5.Open ss_SpringFlowers_wordART_Stickers. Repeat in step 4. You can colorized to match your tube of choose. Move it over to down (see my tag). Effect/3D/Drop Shadow. Repeat -5 on both V & H. On your palette, move Springtime down under the flower.


6.Copy your tube of choose and on your canvas, paste as new layer. Resize 75% (2 times) and make sure no ticked to resize all layers. Move your tube over to leaves (that look like it’s sitting on it). If your tube is standing up. You can move your tube on Springtime (word art).


7.Layer/Merge/Visible Merged.


8.Font of choose. I use Bank Gothic’s LT BT to add my tag (see my tag) on Springtime word art and opacity to 36.


Save as png or jpg.


Be sure to add copyright information/url included your watermark on your tag.


Read more...

Spring Is Here! Template #7

>> Monday, February 8, 2010


YAY! I have made new template is called Spring Is Here! Template #7! I know all of you have waiting for the spring is arrival!!  You can download-HERE

Read more...

Happy Birthday Masked

>> Friday, February 5, 2010


PSP 7, 8, 9, 10, 11 OR 12

Tube of choose-I use Karen Middleton. You can purchase from CILM-HERE

Template-Happy Birthday #6. Download-HERE . Enjoy your new template. :)

Font of your choose

Scrap Kits (New Beginning)-Download from her site-HERE

Mask-I use 0mask046_LT and put them in your folder to add to your mask files-DOWNLOAD HERE


1.Open template-Happy Birthday


2.Click on dot and blind black square. You can colorized to match the tubes. Adjust//Hue and Satauration your choose settings.


3.Click on gold happy border. Your choose settings. Again, click on gold birthday border and same settings.


4.Open New Beginning and open Style_NewBeginning_bow_1 or your choose color and you can colorize the bow. Copy and on your canvas, paste as new layer. Resize 75% (make sure no ticked to all of layer) 2 times. Image/Rotate/Free Rotate/left and 15.00. Make sure it’s no ticked to all layer. Move Style_NewBeginning_bow_1 over to left corner (see my tag).


5.Copy your choose tube and on your canvas, paste as new layer.


6. On your palette, click white background, Layers/new layer, fill it with color of your tube match. Layer/Load/Save Mask, looking for 0mask046_LT and click load. Layer/Merge/Merge Group.


7.Layer/Merge Visible.

 
8.Resize 75% (once) and ticked Resize All Layer.

 
9.Font of your choose. I use Hot Pizza to add my tag (see my tag).


Save as png or jpg.


Be sure to add your copyright/URL as well as your watermark on your tag.

Read more...

Happy Birthday Template #6

I have great idea to make template is called Happy Birthday Template #6. Download-HERE

Read more...

Which Is Way Template #5

>> Thursday, February 4, 2010


Horray! I made new template is callled Which Is Way? Template #5.  Download-HERE

Read more...

Good Or Bad-FTU

>> Wednesday, February 3, 2010


PSP 7, 8, 9, 10, 11 OR 12

Tube of choose-I use Popeye Wong (FTU-Free To Use)-DOWNLOAD HERE (2 tubes). Copyright/URL is- ©Popeye Wong www.popeyewong.com

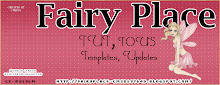
Template-Good Or Bad? #4. Download-HERE . Enjoy your new template. :)

Font of your choose-I use Riot Squard NF.  I can't remember where did I get this

Filter-Tramages/Tow The Line (You might have to google for the filters. Sorry I shouldn’t find it for you to download)


1.Open template-Good Or Bad?

2.Click on green mask. You can colorized to match the tubes. Adjust//Hue and Satauration your choose settings.

3.Open angel-attitude. Copy and on your canvas, paste as new layer. Click on copy of triangle red. Select/All select, Float, Defloat and on top, click raster 2. Selection/Invert and click on Eraser Tool/eraser to erase the tube under the triangle. Select None. On your palette, move the raster 2 under BIG WORD GOOD OR BAD WORDART.

4.Open a-fragile disguise[1]. Click on triangle red. Repeat in step 3.. Move the a-fragile disguise[1] down (see my tag). Select None. Move Raster 3 down under BIG WORD GOOD OR BAD WORDART.

5.Click on BIG WORD GOOD OR BAD WORDART. Click on GOOD.and BAD Magic Wand. Adjust/Hue and Saturation. Select None.
6.Click on red swirl bar. Effect/Tramages/Tow The Line. On your palette, click swirl bar


7.On your palette, click Raster 2. Opacity to 68.
8. Click Raster 3, repeat in step 7.
9.Layer/Merge/Visiible merged.
10.You can resize if you like.


Be sure to add copyright information/url included your watermark on your tag.


Read more...

Good Or Bad? Template #4

>> Monday, February 1, 2010


Finally, I made new template is called Good Or Bad Template #4.

DOWNLOAD-HERE

Read more...

  © WitchysHeart Tweaked it by Ourblogtemplates.com 2008

Back to TOP